This guide can be followed for both App and Pages router as well as Server Actions.
Prerequisites
- Setup a project in
- Ensure TypeScript is installed
- Create a Trigger.dev account
- Create a new Trigger.dev project
Initial setup
Run the CLI `init` command
The easiest way to get started is to use the CLI. It will add Trigger.dev to your existing project, create a It will do a few things:
/trigger folder and give you an example task.Run this command in the root of your project to get started:- Log you into the CLI if you’re not already logged in.
- Create a
trigger.config.tsfile in the root of your project. - Ask where you’d like to create the
/triggerdirectory. - Create the
/triggerdirectory with an example task,/trigger/example.[ts/js].
Run the CLI `dev` command
The CLI
dev command runs a server for your tasks. It watches for changes in your /trigger directory and communicates with the Trigger.dev platform to register your tasks, perform runs, and send data back and forth.It can also update your @trigger.dev/* packages to prevent version mismatches and failed deploys. You will always be prompted first.Perform a test run using the dashboard
The CLI 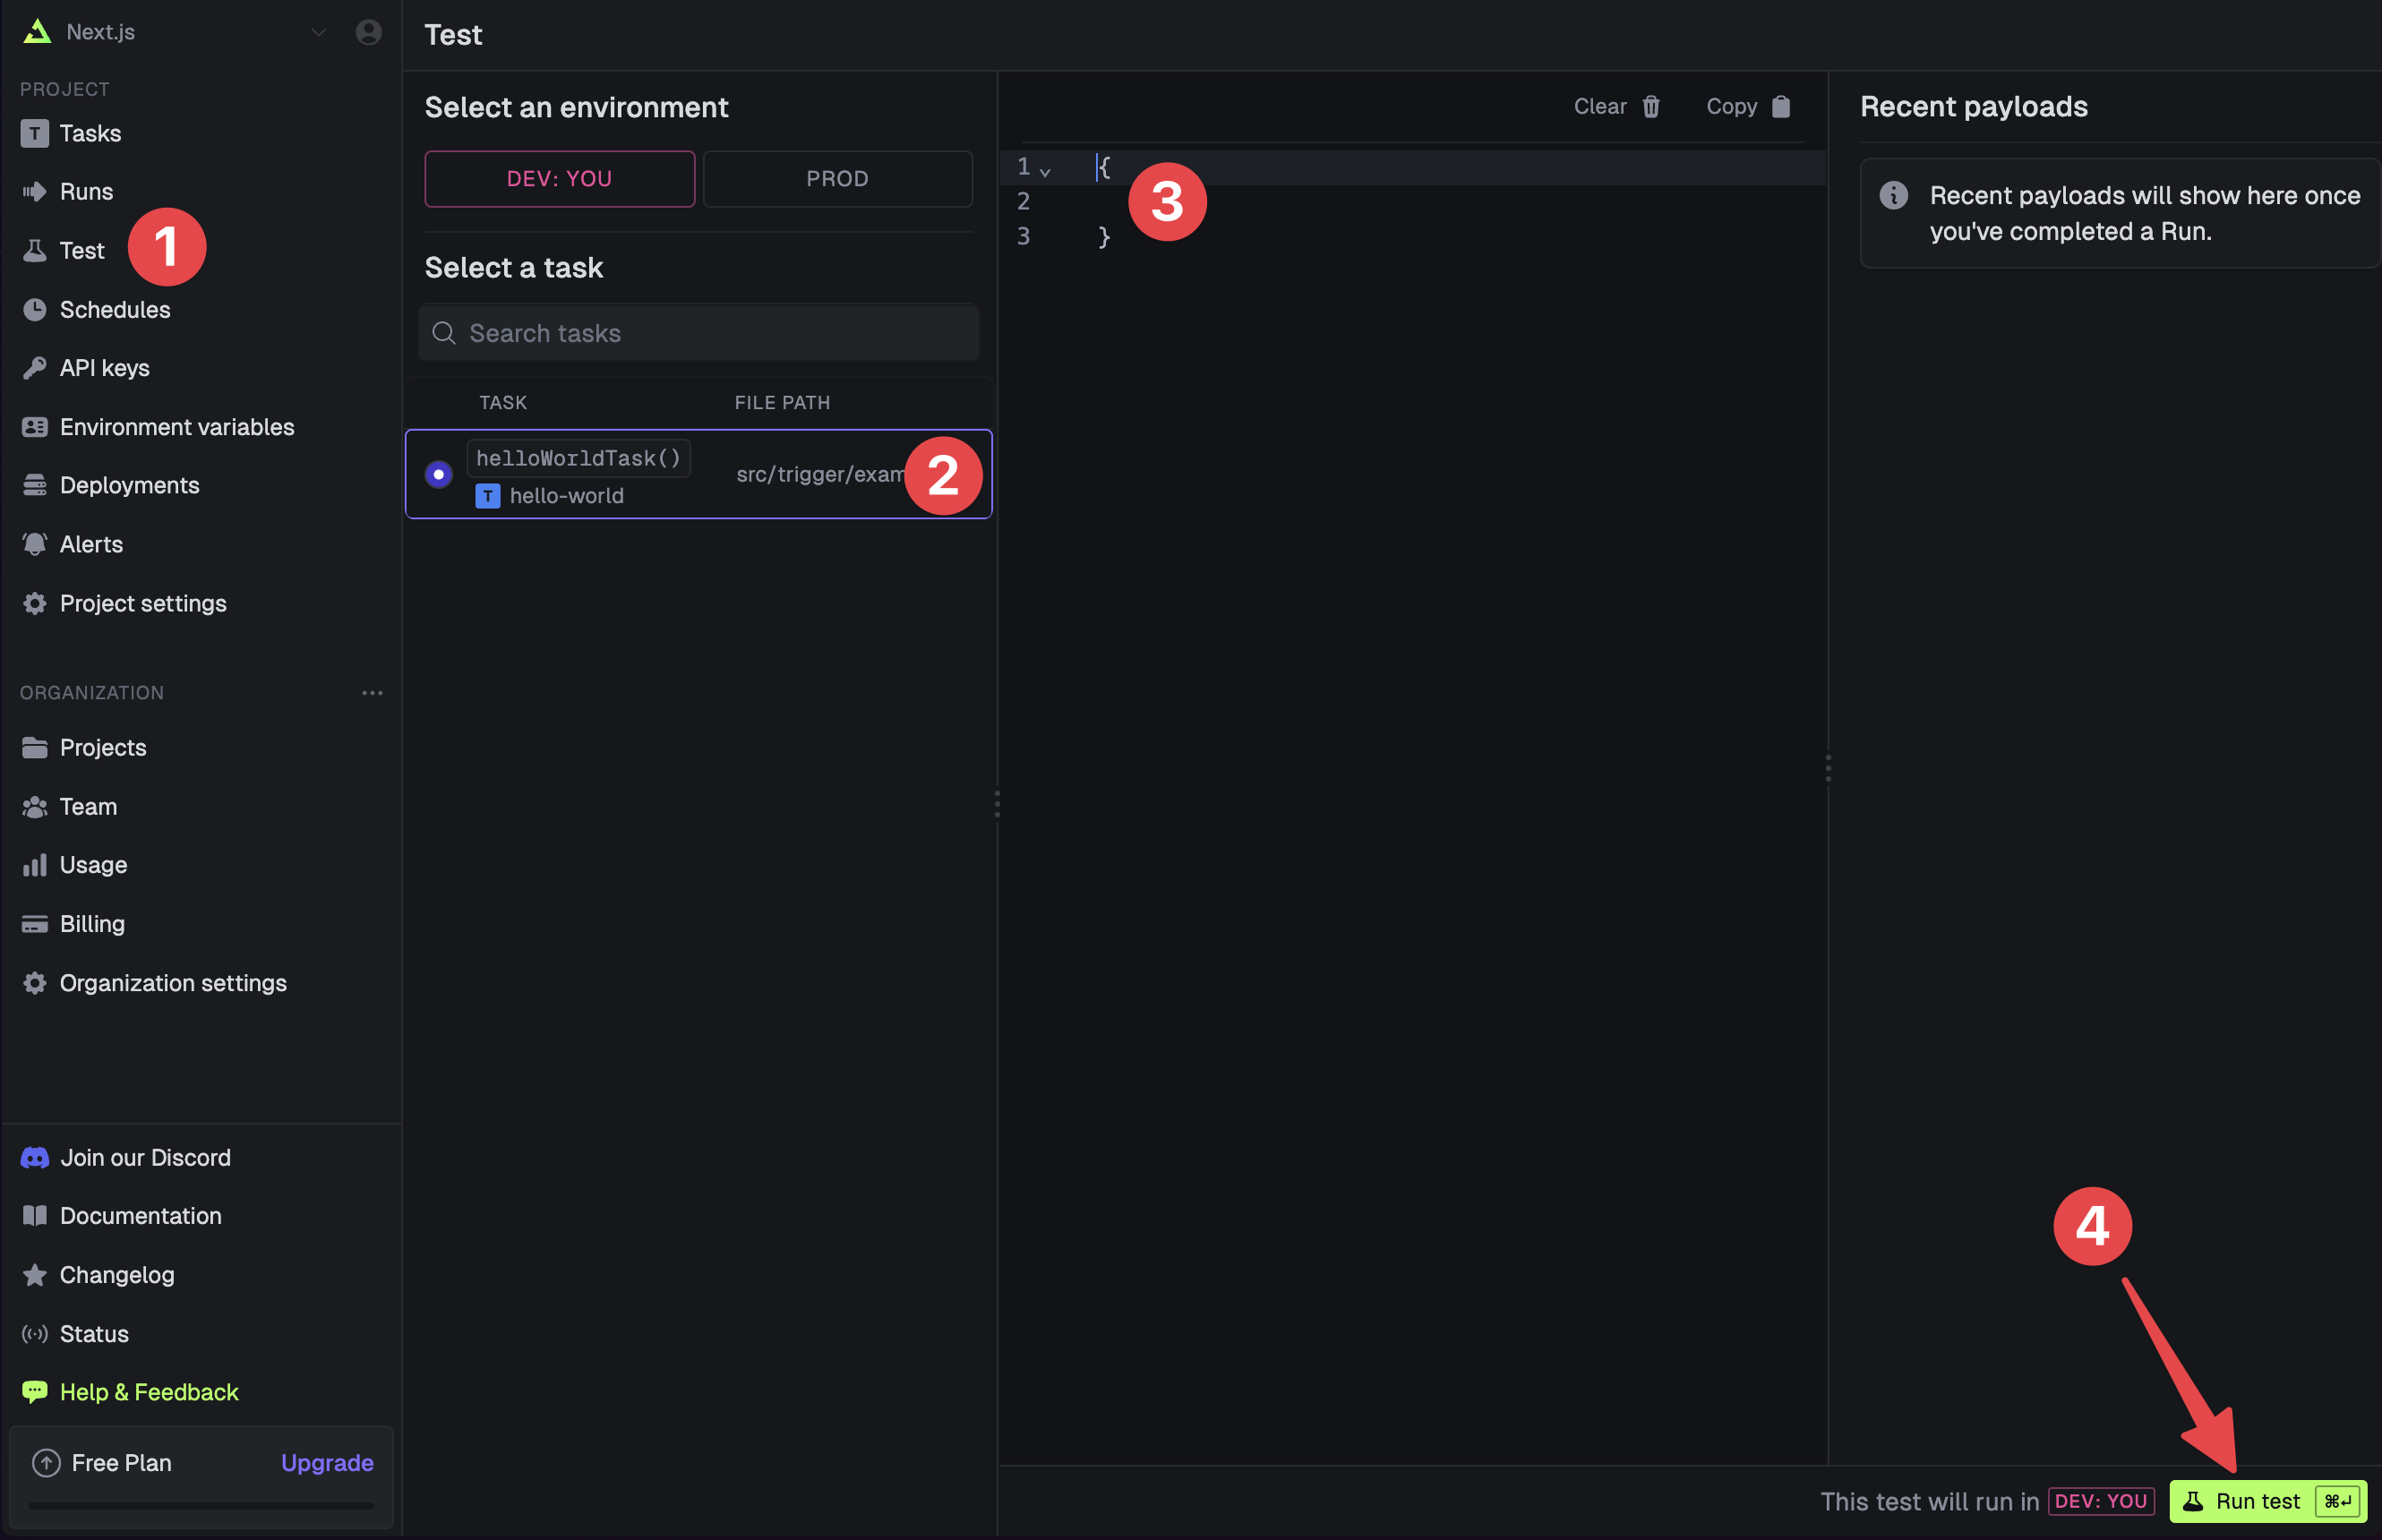
dev command spits out various useful URLs. Right now we want to visit the Test page .You should see our Example task in the list , select it. Most tasks have a “payload” which you enter in the JSON editor , but our example task doesn’t need any input.Press the “Run test” button .

Set your secret key locally
Set yourTRIGGER_SECRET_KEY environment variable in your .env.local file if using the Next.js App router or .env file if using Pages router. This key is used to authenticate with Trigger.dev, so you can trigger runs from your Next.js app. Visit the API Keys page in the dashboard and select the DEV secret key.
 For more information on authenticating with Trigger.dev, see the API keys page.
Triggering your task in Next.js
Here are the steps to trigger your task in the Next.js App and Pages router and Server Actions. Alternatively, check out this repo for a full working example of a Next.js app with a Trigger.dev task triggered using a Server Action.- App Router
- App Router (Server Actions)
- Pages Router
Create a Route Handler
Add a Route Handler by creating a
route.ts file (or route.js file) in the app/api directory like this: app/api/hello-world/route.ts.Add your task
Add this code to your
route.ts file which imports your task along with NextResponse to handle the API route response:app/api/hello-world/route.ts
Trigger your task
Run your Next.js app:Run the dev server from Step 2. of the Initial Setup section above if it’s not already running:Now visit the URL in your browser to trigger the task. Ensure the port number is the same as the one you’re running your Next.js app on. For example, if you’re running your Next.js app on port 3000, visit:You should see the CLI log the task run with a link to view the logs in the dashboard.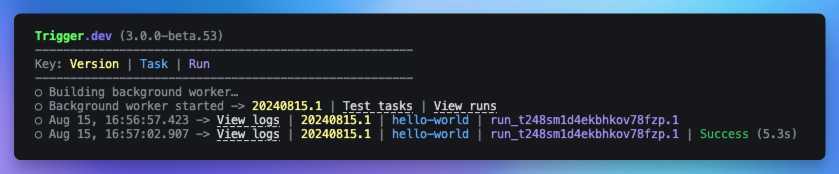 Visit the Trigger.dev dashboard to see your run.
Visit the Trigger.dev dashboard to see your run.Add your environment variables (optional)
If you have any environment variables in your tasks, be sure to add them in the dashboard so deployed code runs successfully. In Node.js, these environment variables are accessed in your code usingprocess.env.MY_ENV_VAR.
In the sidebar select the “Environment Variables” page, then press the “New environment variable”
button.  You can add values for your local dev environment, staging and prod.
  You can also add environment variables in code by following the steps on the Environment Variables page.
Deploying your task to Trigger.dev
For this guide, we’ll manually deploy your task by running the CLI deploy command below. Other ways to deploy are listed in the next section.Other ways to deploy
- GitHub Actions
- Vercel Integration
Use GitHub Actions to automatically deploy your tasks whenever new code is pushed and when the
trigger directory has changes in it. Follow this guide to set up GitHub Actions.Troubleshooting
Next.js build failing due to missing API key in GitHub CI
This issue occurs during the Next.js app build process on GitHub CI where the Trigger.dev SDK is expecting the TRIGGER_SECRET_KEY environment variable to be set at build time. Next.js attempts to compile routes and creates static pages, which can cause issues with SDKs that require runtime environment variables. The solution is to mark the relevant pages as dynamic to prevent Next.js from trying to make them static. You can do this by adding the following line to the route file:Correctly passing event handlers to React components
An issue can sometimes arise when you try to pass a function directly to theonClick prop. This is because the function may require specific arguments or context that are not available when the event occurs. By wrapping the function call in an arrow function, you ensure that the handler is called with the correct context and any necessary arguments. For example:
This works:
Additional resources for Next.js
Next.js - triggering tasks using webhooks
How to create a webhook handler in a Next.js app, and trigger a task from it.
Useful next steps
Tasks overview
Learn what tasks are and their options
Writing tasks
Learn how to write your own tasks
Deploy using the CLI
Learn how to deploy your task manually using the CLI
Deploy using GitHub actions
Learn how to deploy your task using GitHub actions